Android端末はGoogle Pixel 8しか持っていないから、他のAndroid端末で同じことができるか分からないけど「開発者向けオプション」の「Linux 開発環境」で「(試験運用板) AndroidでLinuxターミナルを実行する」を有効にすると、アプリ一覧に「ターミナル」が出てくる。
アプリ名は「ターミナル」だけど、Windows Subsystem for Linux (WSL) のように Debian 12 がほぼ丸々動いているので、ただのターミナルアプリ以上のことができる。
確認した環境
- Google Pixel 8
- Android 16
中身
ターミナルアプリの中身はarm64版のDebian 12.11(2025/09/17現在)
droid@localhost:~$ cat /etc/os-release
PRETTY_NAME="Debian GNU/Linux 12 (bookworm)"
NAME="Debian GNU/Linux"
VERSION_ID="12"
VERSION="12 (bookworm)"
VERSION_CODENAME=bookworm
ID=debian
HOME_URL="https://www.debian.org/"
SUPPORT_URL="https://www.debian.org/support"
BUG_REPORT_URL="https://bugs.debian.org/"
droid@localhost:~$ cat /etc/debian_version
12.11
droid@localhost:~$ uname -a
Linux localhost 6.1.0-34-avf-arm64 #1 SMP Debian 6.1.135-1 (2025-04-25) aarch64 GNU/Linux
2025/09/17の時点では apt update → apt upgrade すれば、12.12まで上がる。
できないこと
- ターミナルアプリとの直接通信
- ターミナルアプリのネットワークはAndroidがNATとなってその裏にいるので、LAN上の別のホストからは直接の通信はできなかった。
- ターミナルアプリがポート転送してくれるけど、あくまでAndroidからのアクセスのみ許可されているようで、LAN上の他のホストからは接続できなかった。
- ターミナルアプリで稼働するOS(ディストリビューション)の変更
- WSLのように他のOSを選ぶことはできないように見える。
できること
OpenSSH Client & Server
OpenSSH ClientもOpenSSH Serverも、デフォルトではどちらも入っていないけどインストールできる。
droid@localhost:~$ ssh
-bash: ssh: command not found
droid@localhost:~$ sudo apt update
Get:1 file:/etc/apt/mirrors/debian.list Mirrorlist [30 B]
Get:2 file:/etc/apt/mirrors/debian-security.list Mirrorlist [39 B]
Hit:3 https://deb.debian.org/debian bookworm InRelease
Hit:4 https://deb.debian.org/debian bookworm-updates InRelease
Hit:5 https://deb.debian.org/debian bookworm-backports InRelease
Get:6 https://deb.debian.org/debian-security bookworm-security InRelease [48.0 kB]
Fetched 48.0 kB in 2s (25.2 kB/s)
Reading package lists... Done
Building dependency tree... Done
Reading state information... Done
All packages are up to date.
droid@localhost:~$ sudo apt install openssh-client openssh-server
Reading package lists... Done
Building dependency tree... Done
Reading state information... Done
The following additional packages will be installed:
  libcbor0.8 libfido2-1 ncurses-term openssh-sftp-server
  runit-helper
Suggested packages:
  keychain libpam-ssh monkeysphere ssh-askpass
  molly-guard ufw
The following NEW packages will be installed:
  libcbor0.8 libfido2-1 ncurses-term openssh-client
  openssh-server openssh-sftp-server runit-helper
0 upgraded, 7 newly installed, 0 to remove and 0 not upgraded.
Need to get 2011 kB of archives.
After this operation, 13.6 MB of additional disk space will be used.
Do you want to continue? [Y/n] y
Get:1 file:/etc/apt/mirrors/debian.list Mirrorlist [30 B]
Get:2 https://deb.debian.org/debian bookworm/main arm64 libcbor0.8 arm64 0.8.0-2+b1 [26.0 kB]
Get:3 https://deb.debian.org/debian bookworm/main arm64 libfido2-1 arm64 1.12.0-2+b1 [72.6 kB]
Get:4 https://deb.debian.org/debian bookworm/main arm64 openssh-client arm64 1:9.2p1-2+deb12u7 [934 kB]
Get:5 https://deb.debian.org/debian bookworm/main arm64 openssh-sftp-server arm64 1:9.2p1-2+deb12u7 [60.2 kB]
Get:6 https://deb.debian.org/debian bookworm/main arm64 runit-helper all 2.15.2 [6520 B]
Get:7 https://deb.debian.org/debian bookworm/main arm64 openssh-server arm64 1:9.2p1-2+deb12u7 [411 kB]
Get:8 https://deb.debian.org/debian bookworm/main arm64 ncurses-term all 6.4-4 [501 kB]
Fetched 2011 kB in 1s (2843 kB/s)
Preconfiguring packages ...
Selecting previously unselected package libcbor0.8:arm64.
(Reading database ... 25472 files and directories currently installed.)
Preparing to unpack .../0-libcbor0.8_0.8.0-2+b1_arm64.deb ...
Unpacking libcbor0.8:arm64 (0.8.0-2+b1) ...
Selecting previously unselected package libfido2-1:arm64.
Preparing to unpack .../1-libfido2-1_1.12.0-2+b1_arm64.deb ...
Unpacking libfido2-1:arm64 (1.12.0-2+b1) ...
Selecting previously unselected package openssh-client.
Preparing to unpack .../2-openssh-client_1%3a9.2p1-2+deb12u7_arm64.deb ...
Unpacking openssh-client (1:9.2p1-2+deb12u7) ...
Selecting previously unselected package openssh-sftp-server.
Preparing to unpack .../3-openssh-sftp-server_1%3a9.2p1-2+deb12u7_arm64.deb ...
Unpacking openssh-sftp-server (1:9.2p1-2+deb12u7) ...
Selecting previously unselected package runit-helper.
Preparing to unpack .../4-runit-helper_2.15.2_all.deb ...
Unpacking runit-helper (2.15.2) ...
Selecting previously unselected package openssh-server.
Preparing to unpack .../5-openssh-server_1%3a9.2p1-2+deb12u7_arm64.deb ...
Unpacking openssh-server (1:9.2p1-2+deb12u7) ...
Selecting previously unselected package ncurses-term.
Preparing to unpack .../6-ncurses-term_6.4-4_all.deb ...
Unpacking ncurses-term (6.4-4) ...
Setting up runit-helper (2.15.2) ...
Setting up libcbor0.8:arm64 (0.8.0-2+b1) ...
Setting up libfido2-1:arm64 (1.12.0-2+b1) ...
Setting up ncurses-term (6.4-4) ...
Setting up openssh-client (1:9.2p1-2+deb12u7) ...
Setting up openssh-sftp-server (1:9.2p1-2+deb12u7) ...
Setting up openssh-server (1:9.2p1-2+deb12u7) ...

Creating config file /etc/ssh/sshd_config with new version
Creating SSH2 RSA key; this may take some time ...
3072 SHA256:FX7VVjkYh38kKc84sbd7OXGtQf16fvUE4oIXx2//7e0 root@localhost (RSA)
Creating SSH2 ECDSA key; this may take some time ...
256 SHA256:piTpvGJ7bSVUUtPJgncRNJiU++54iQ62hrH0Q04iuSE root@localhost (ECDSA)
Creating SSH2 ED25519 key; this may take some time ...
256 SHA256:RaGIbJ1Z98edkh1dsjQ/FbIaC3tTq2sJw8NxcsgnJgw root@localhost (ED25519)
Created symlink /etc/systemd/system/sshd.service → /lib/systemd/system/ssh.service.
Created symlink /etc/systemd/system/multi-user.target.wants/ssh.service → /lib/systemd/system/ssh.service.
rescue-ssh.target is a disabled or a static unit, not starting it.
ssh.socket is a disabled or a static unit, not starting it.
Processing triggers for man-db (2.11.2-2) ...
Processing triggers for libc-bin (2.36-9+deb12u13) ...
droid@localhost:~$ ssh -V
OpenSSH_9.2p1 Debian-2+deb12u7, OpenSSL 3.0.17 1 Jul 2025
「できないこと」にも書いたけど、ターミナルアプリのDebianに直接のSSH接続はできない。
以下のようにターミナルアプリから別のホストにSSHリモート転送し、
droid@localhost:~$ ssh user1@bastion1 -R10022:localhost:22
更に以下のようにリモート転送経由で接続すれば、ターミナルアプリのDebianにSSHで入ることはできる。
user1@bastion1 ~ % ssh user1@localhost -p 10022
droidユーザーのパスワードは分からないから別のユーザーを作っておくか、/home/droid/.ssh/authorized_keys にSSH鍵を書いておく。
もちろん、サーバーが不要ならクライアントだけでもいい。
SSHクライアントなら ConnectBot や JuiceSSH という選択肢もあるけど、CLI操作に慣れていて以下と組み合わせて使うならアリだと思う。
Visual Studo Code
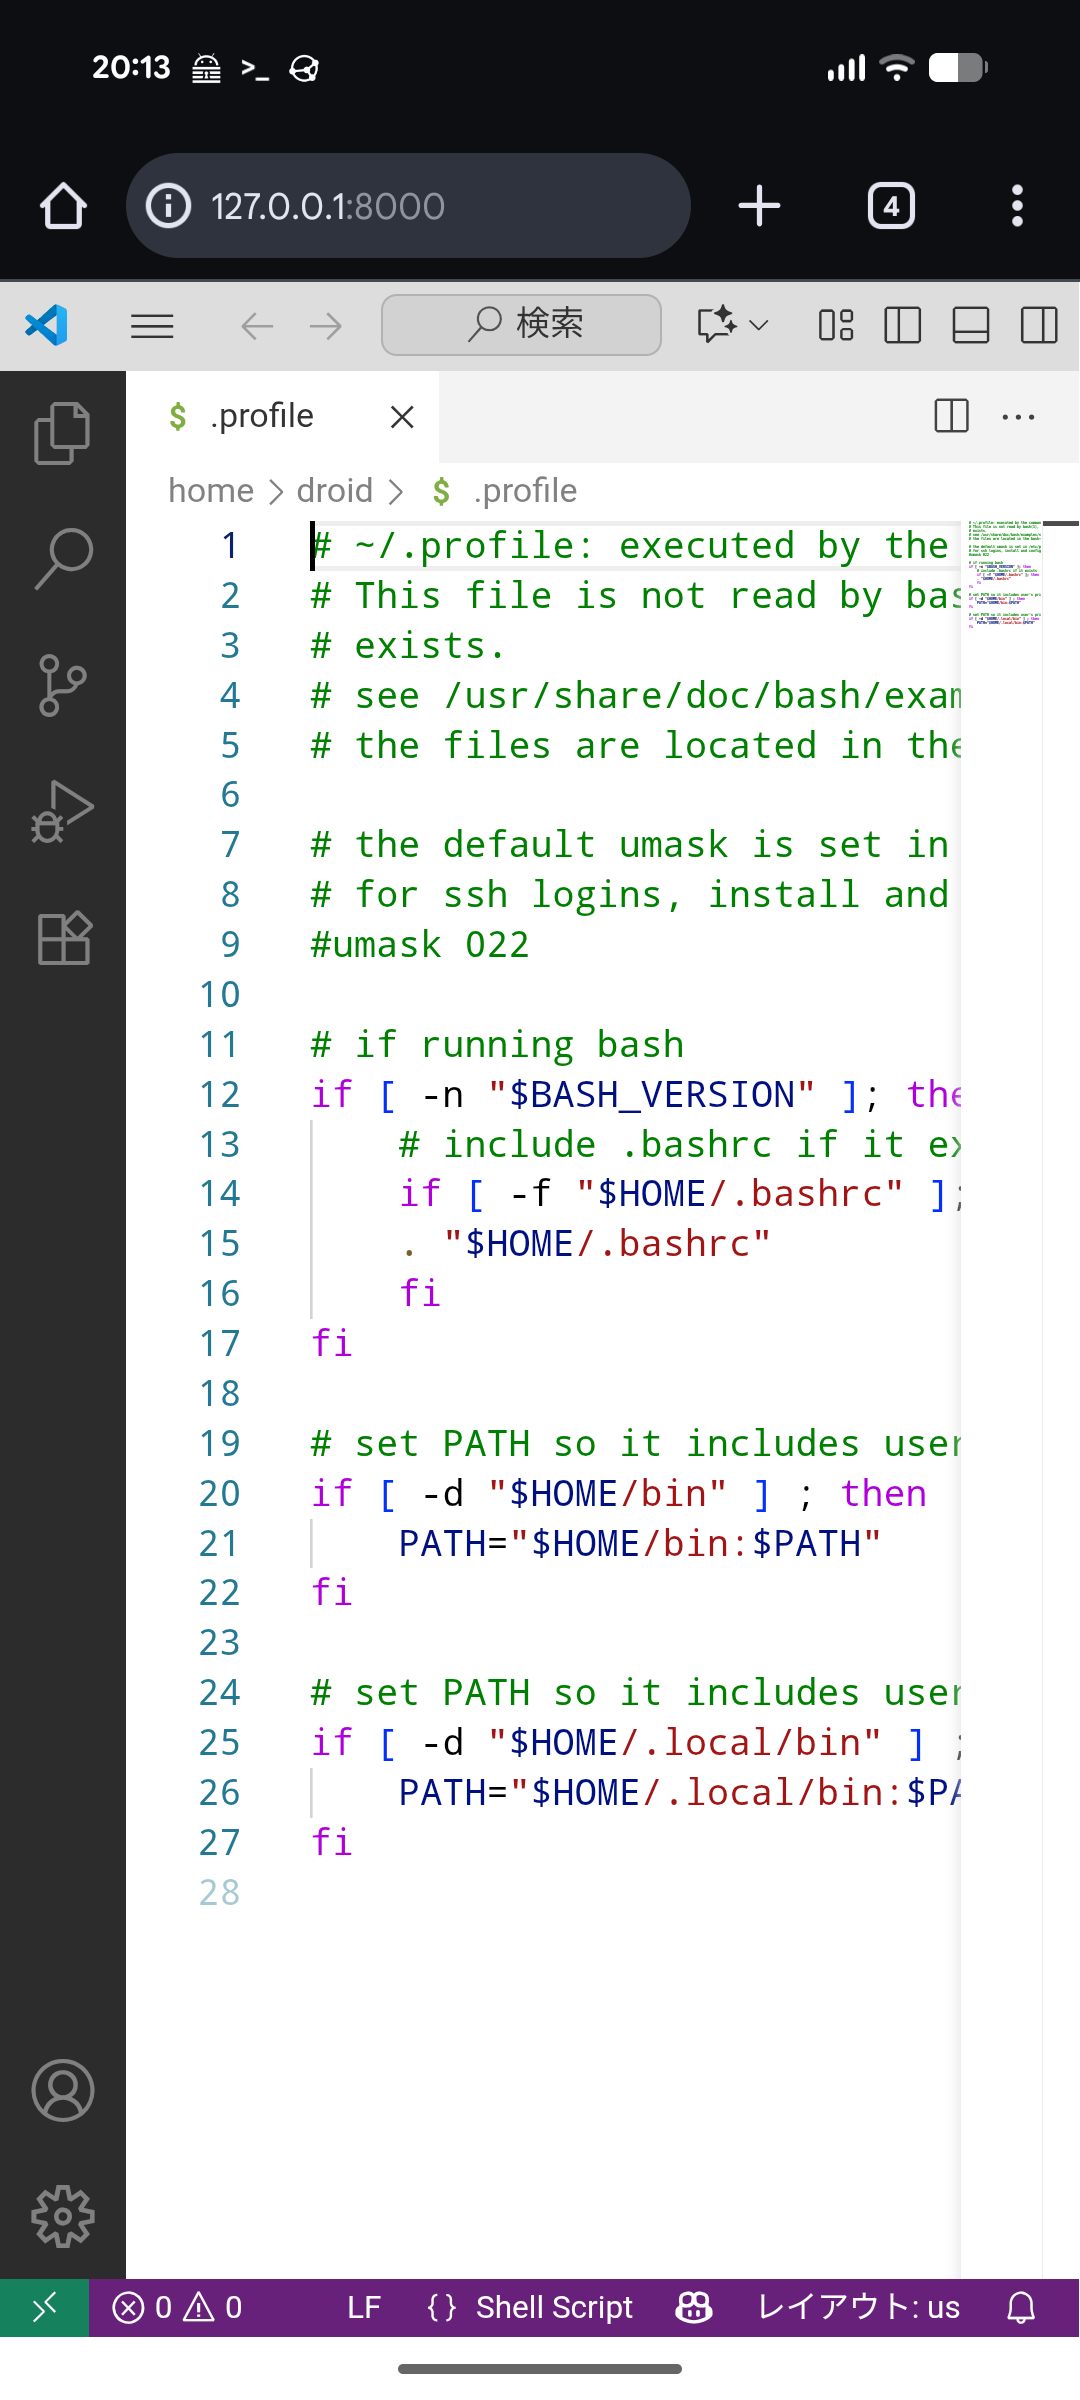
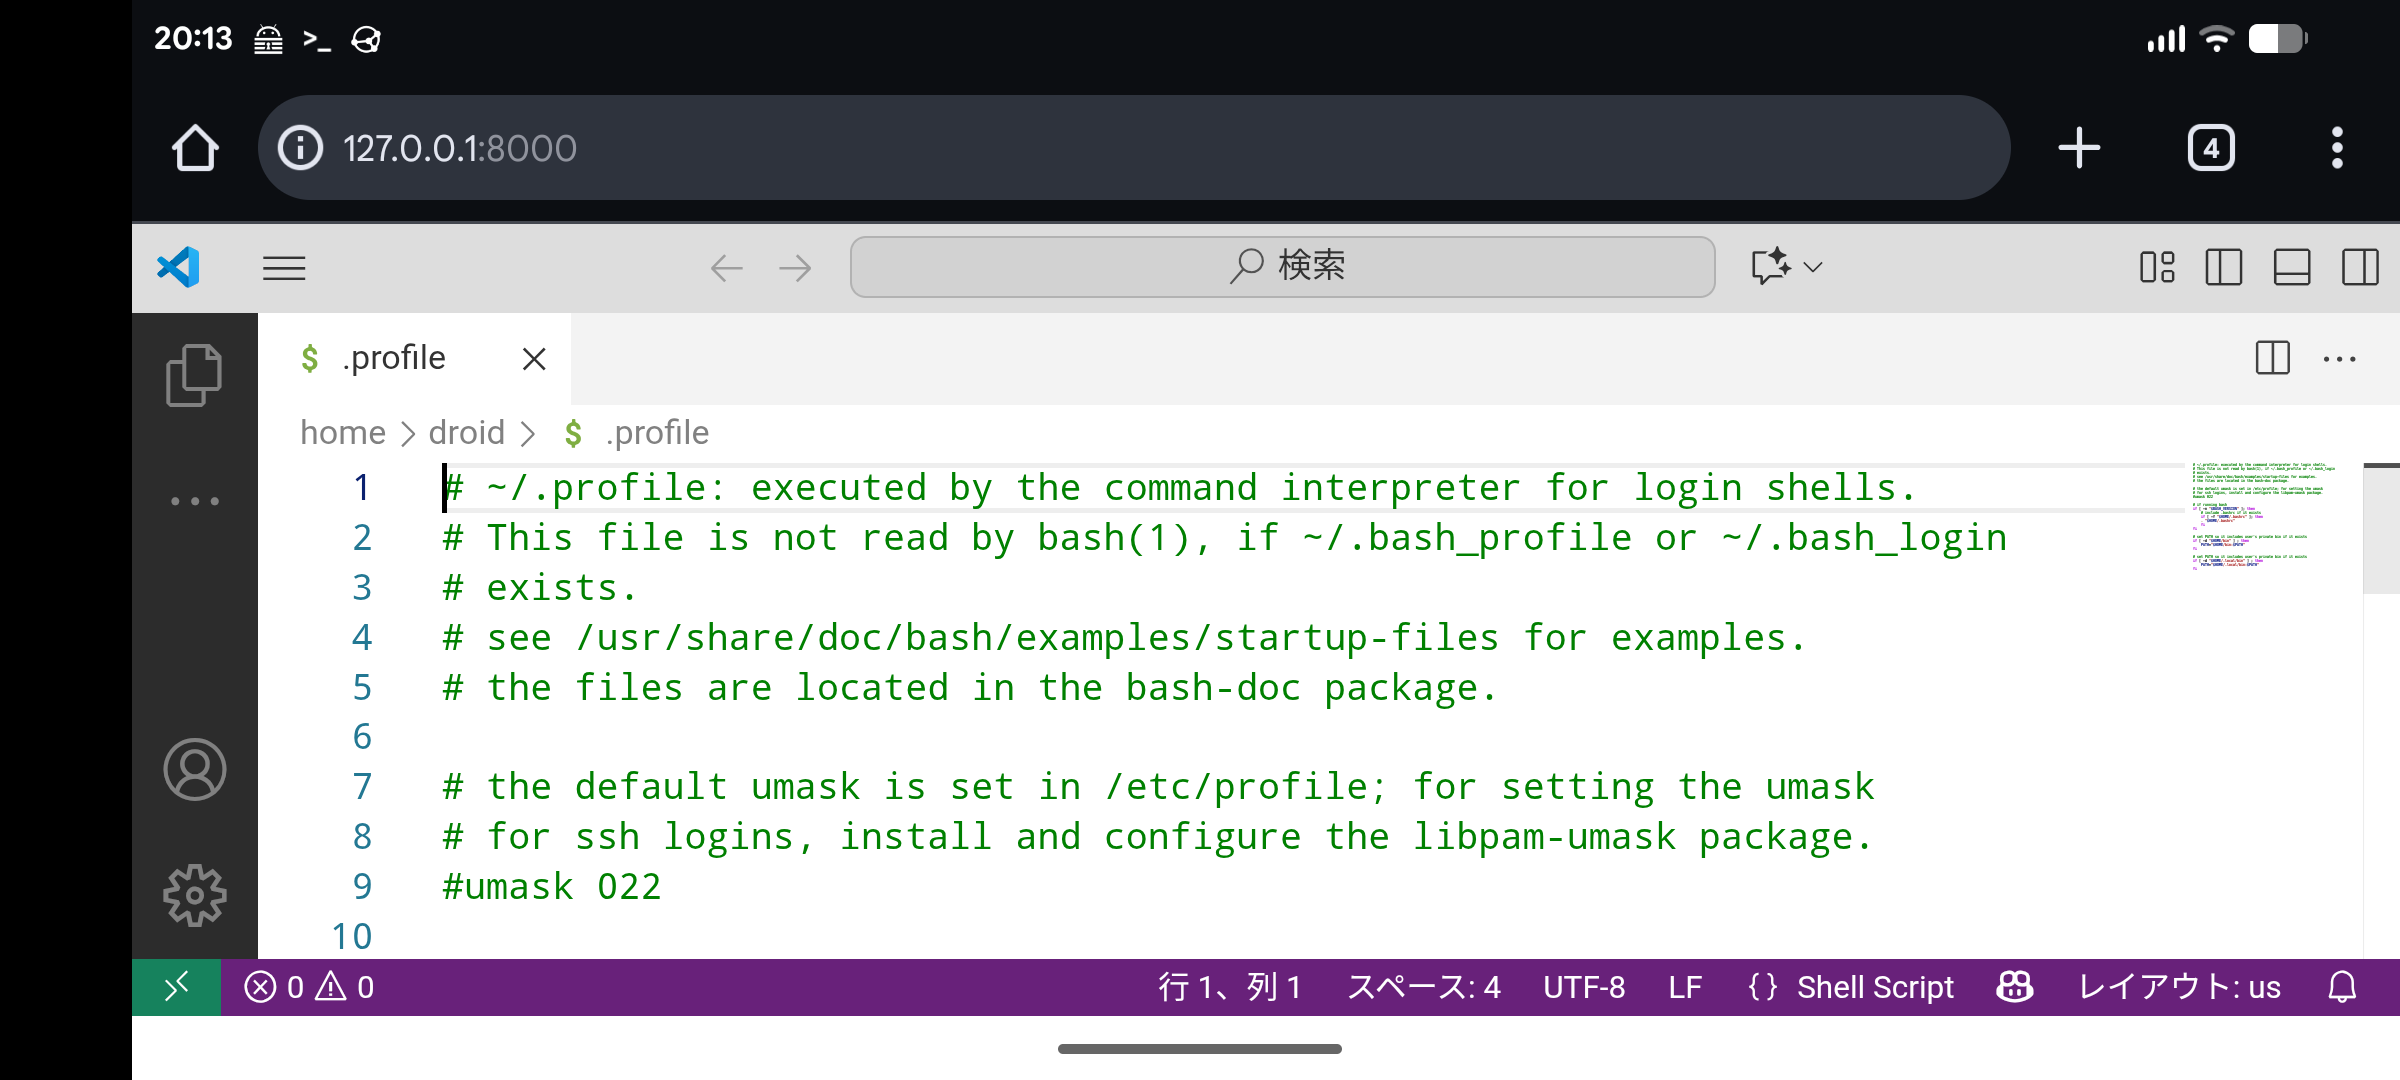
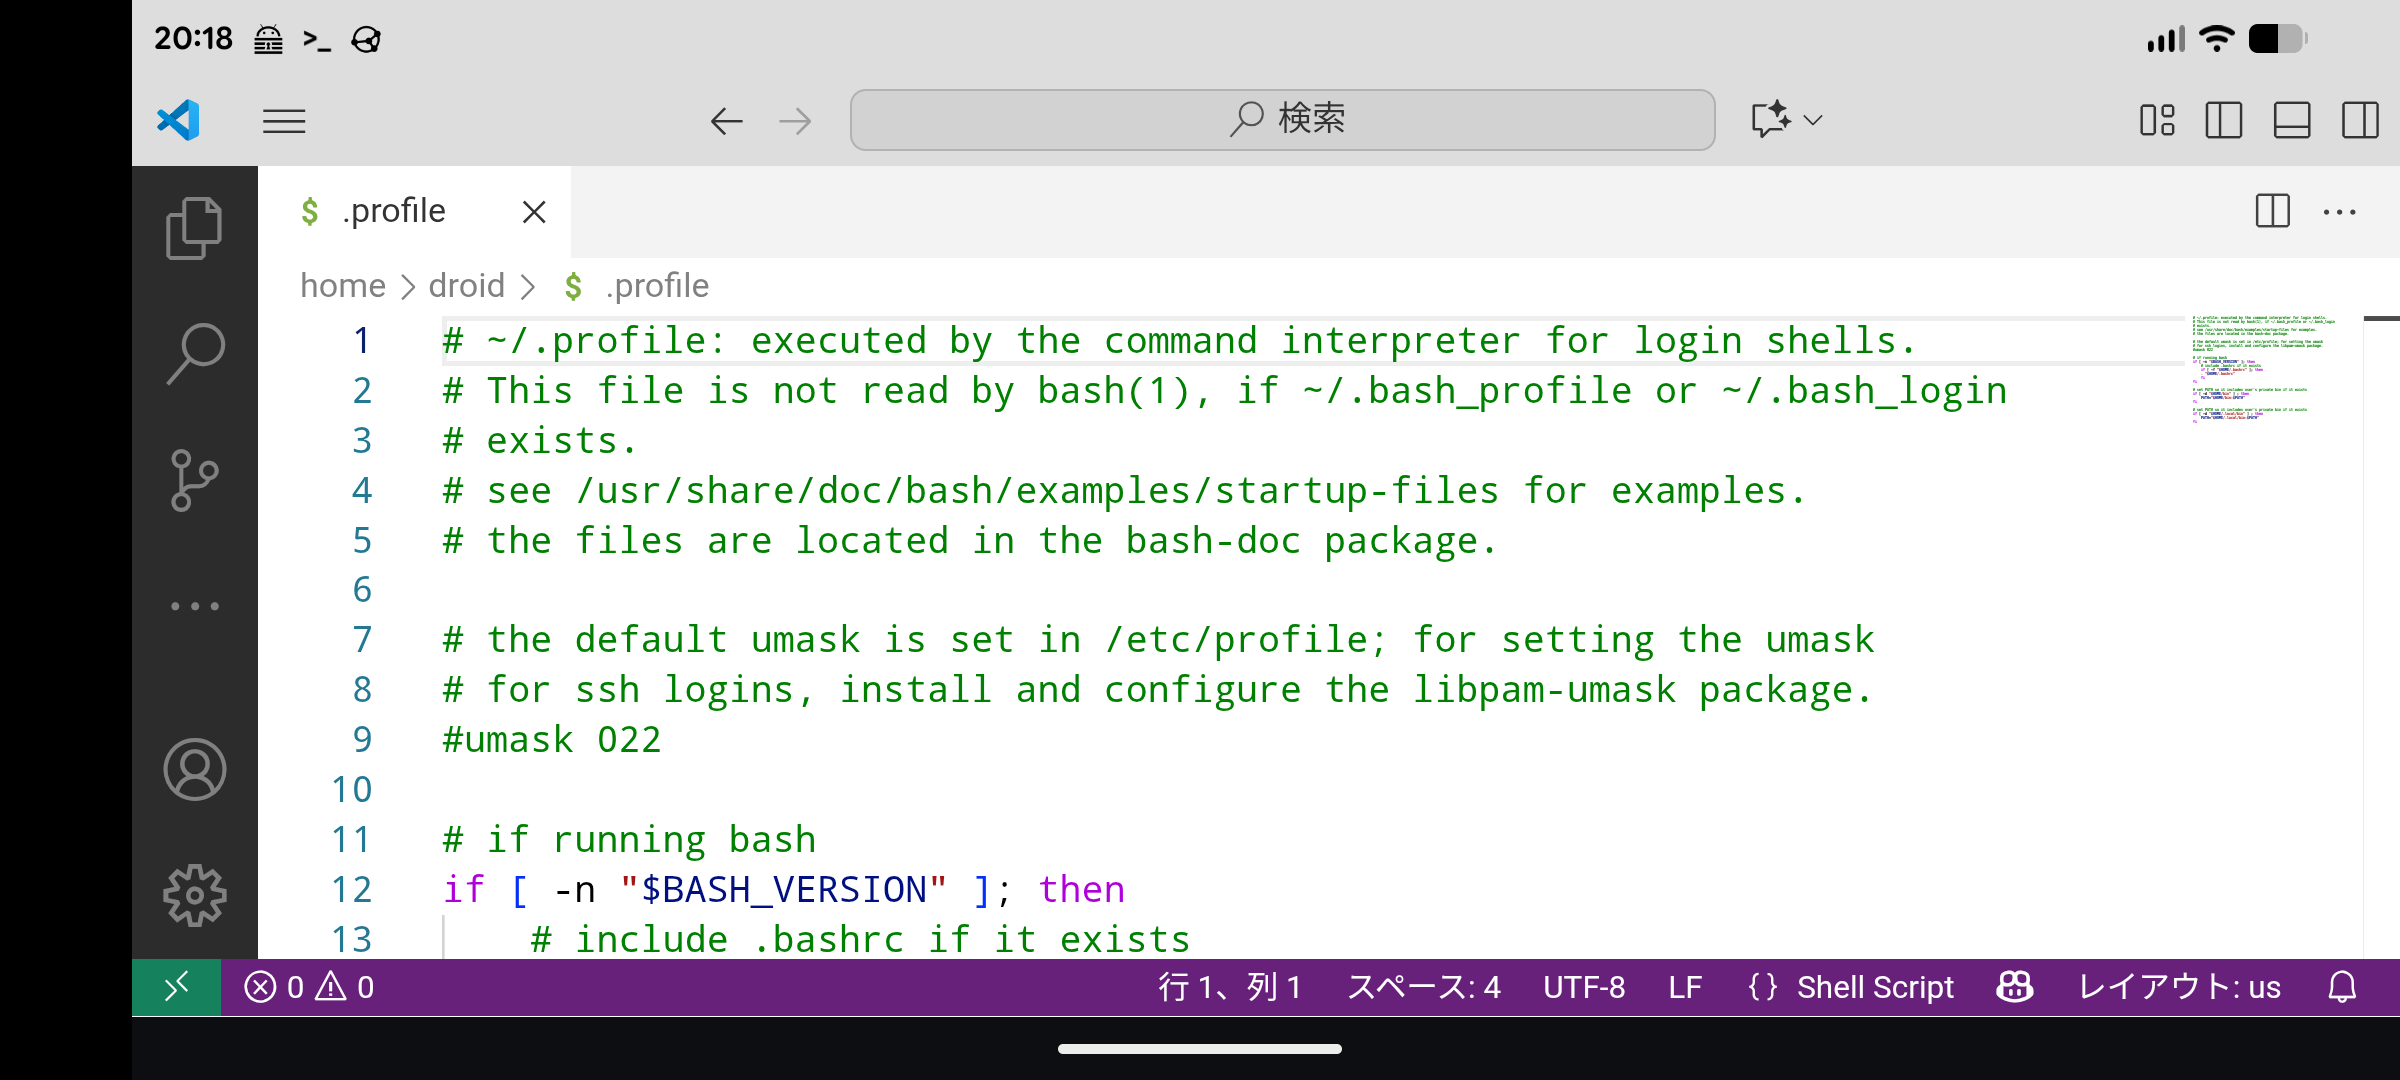
GUI アプリケーションを直接起動はできないけど、CLI版をserve-webオプションで起動するとWeb GUIを起動できる。
AndroidのWebブラウザからアクセスすれば、Androidスマホ単体でもVS Codeを使うことができる。
VS Codeのダウンロードページには、各プラットフォームの下の方にCLI版のダウンロードリンクも用意されているので、Linux版のArm64をPixelのWebブラウザでダウンロードしておく。
Androidのダウンロードフォルダは /mnt/shared としてマウントされていて、ターミナルアプリからもアクセスできる。
- 適当にディレクトリを作成
droid@localhost:~$ mkdir ~/bin - ダウンロードしたファイルを展開
droid@localhost:~$ tar xzf /mnt/shared/vscode_cli_alpine_arm64_cli.tar.gz -C ~/bin/ - バージョンはこんな感じ
droid@localhost:~$ ~/bin/code -V code 1.100.0 (commit 19e0f9e681ecb8e5c09d8784acaa601316ca4571) - 自分で自分をアップデートできるので更新しておく
droid@localhost:~$ ~/bin/code update Successfully updated to 1.104.0 (commit f220831ea2d946c0dcb0f3eaa480eb435a2c1260) droid@localhost:~$ ~/bin/code -V code 1.104.0 (commit f220831ea2d946c0dcb0f3eaa480eb435a2c1260) - Web GUI起動
普通に起動するとトークン付きで起動する
トークン無しで起動したい場合はこんな感じdroid@localhost:~$ code serve-web * * Visual Studio Code Server * * By using the software, you agree to * the Visual Studio Code Server License Terms (https://aka.ms/vscode-server-license) and * the Microsoft Privacy Statement (https://privacy.microsoft.com/en-US/privacystatement). * Web UI available at http://127.0.0.1:8000?tkn=hogehoge-a774-4771-8119-fugafugadroid@localhost:~$ code serve-web --without-connection-token * * Visual Studio Code Server * * By using the software, you agree to * the Visual Studio Code Server License Terms (https://aka.ms/vscode-server-license) and * the Microsoft Privacy Statement (https://privacy.microsoft.com/en-US/privacystatement). * Web UI available at http://127.0.0.1:8000 - リクエストされたポートを許可
「ターミナルが新しいポートを開くリクエストをしました」と通知されるので許可する - あとはAndroidのWebブラウザからアクセスするだけ
- 終了はCtrl + c
PWA (Progressive Web App) としてインストールできるから、上下方向に若干広がるものの、狭いことに変わりない…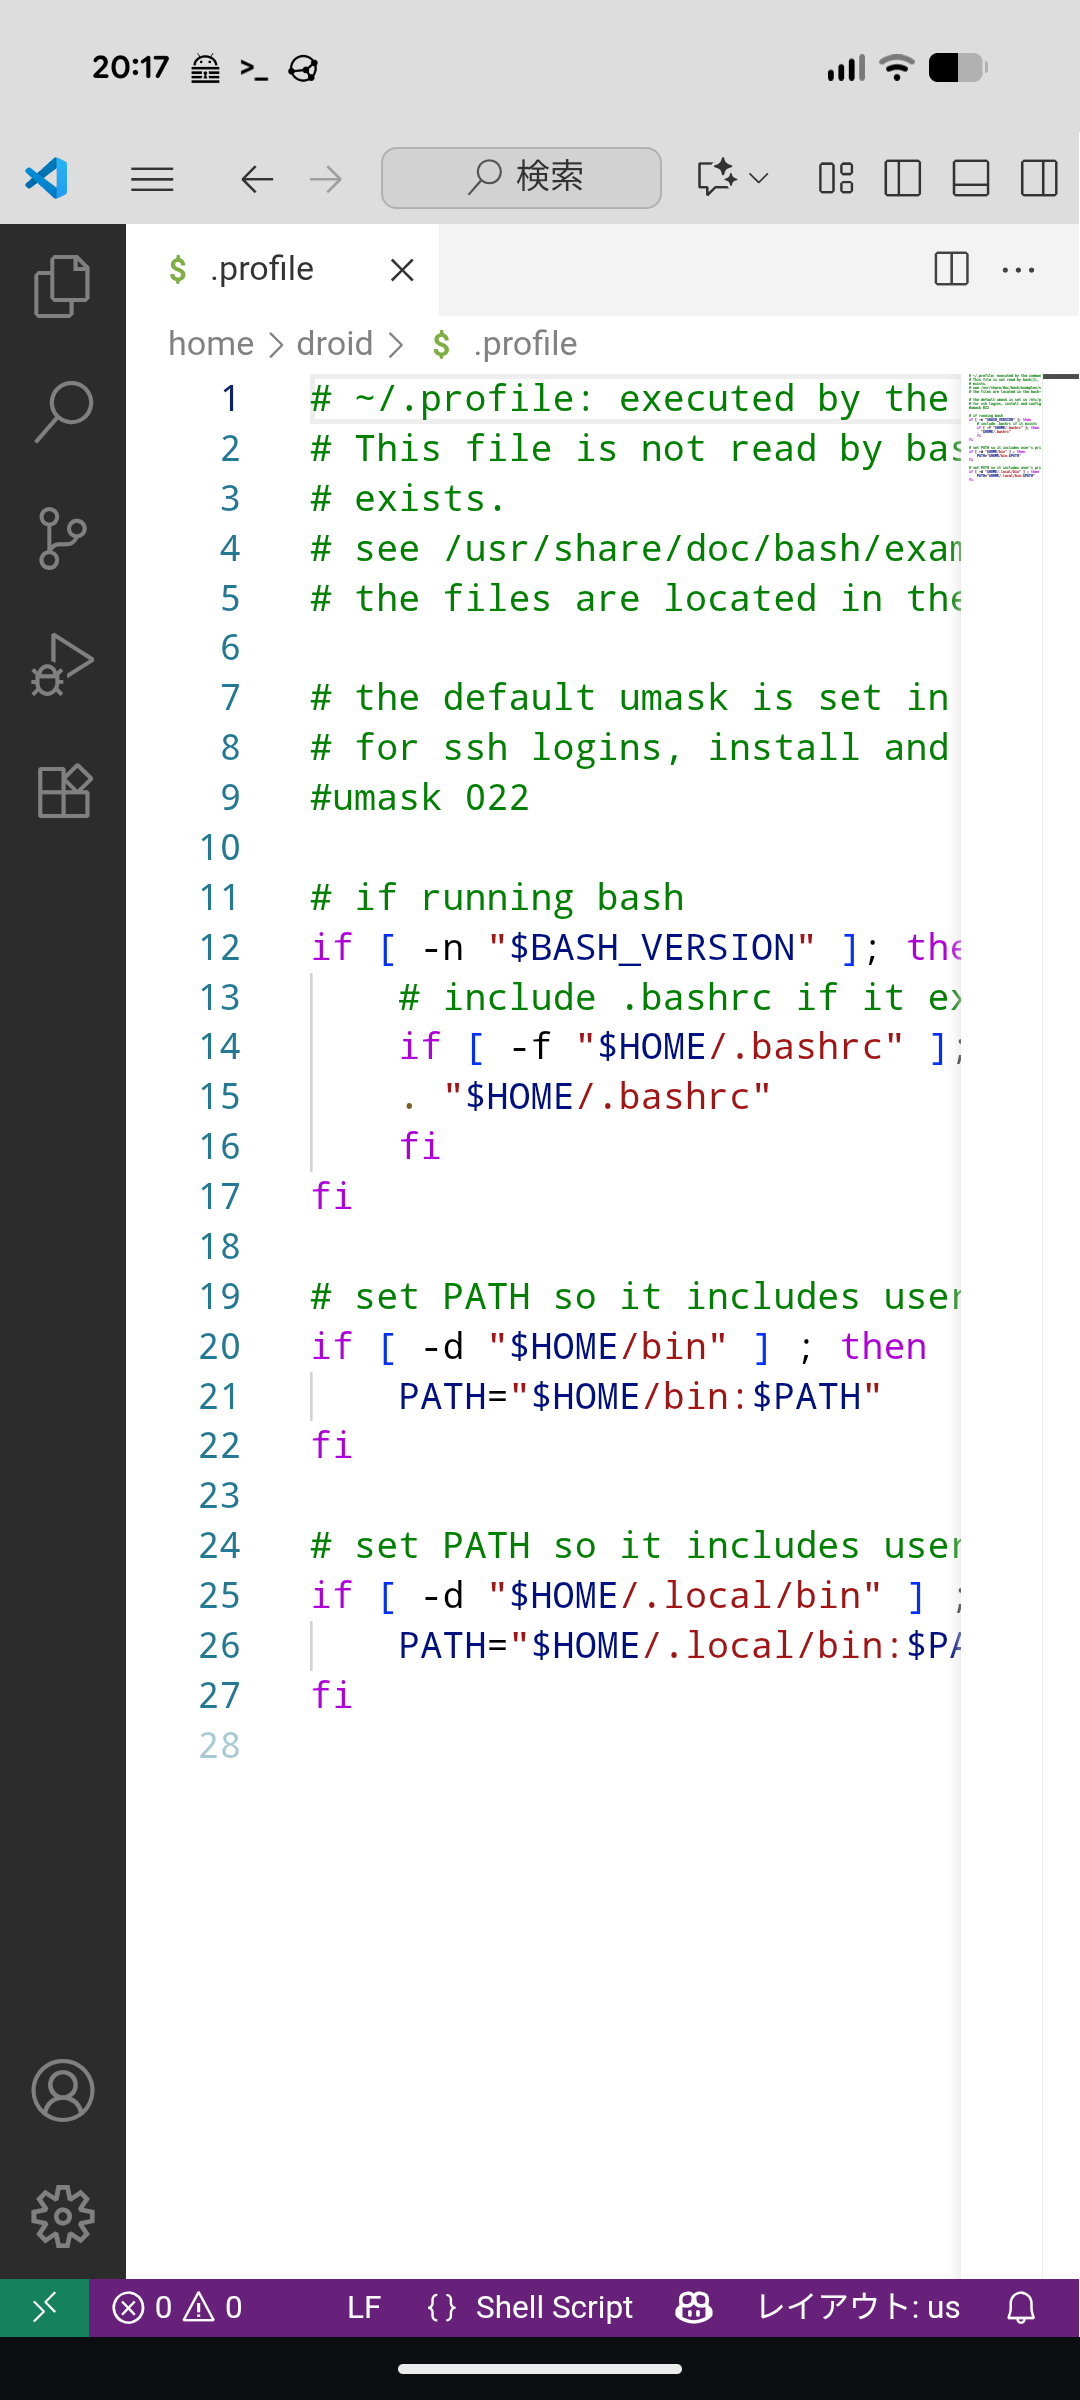
Pixel 8はUSB-C DisplayPort(DP Alt Mode)に対応しているから、開発者向けオプションでデスクトップエクスペリエンス機能を有効にして、セカンダリディスプレイでデスクトップウィンドウ表示するとかなり使い勝手が上がる。
セカンダリディスプレイはスクリーンショットを撮れないからスクリーンレコード機能で撮影した動画からの画像だけど、こんな感じ。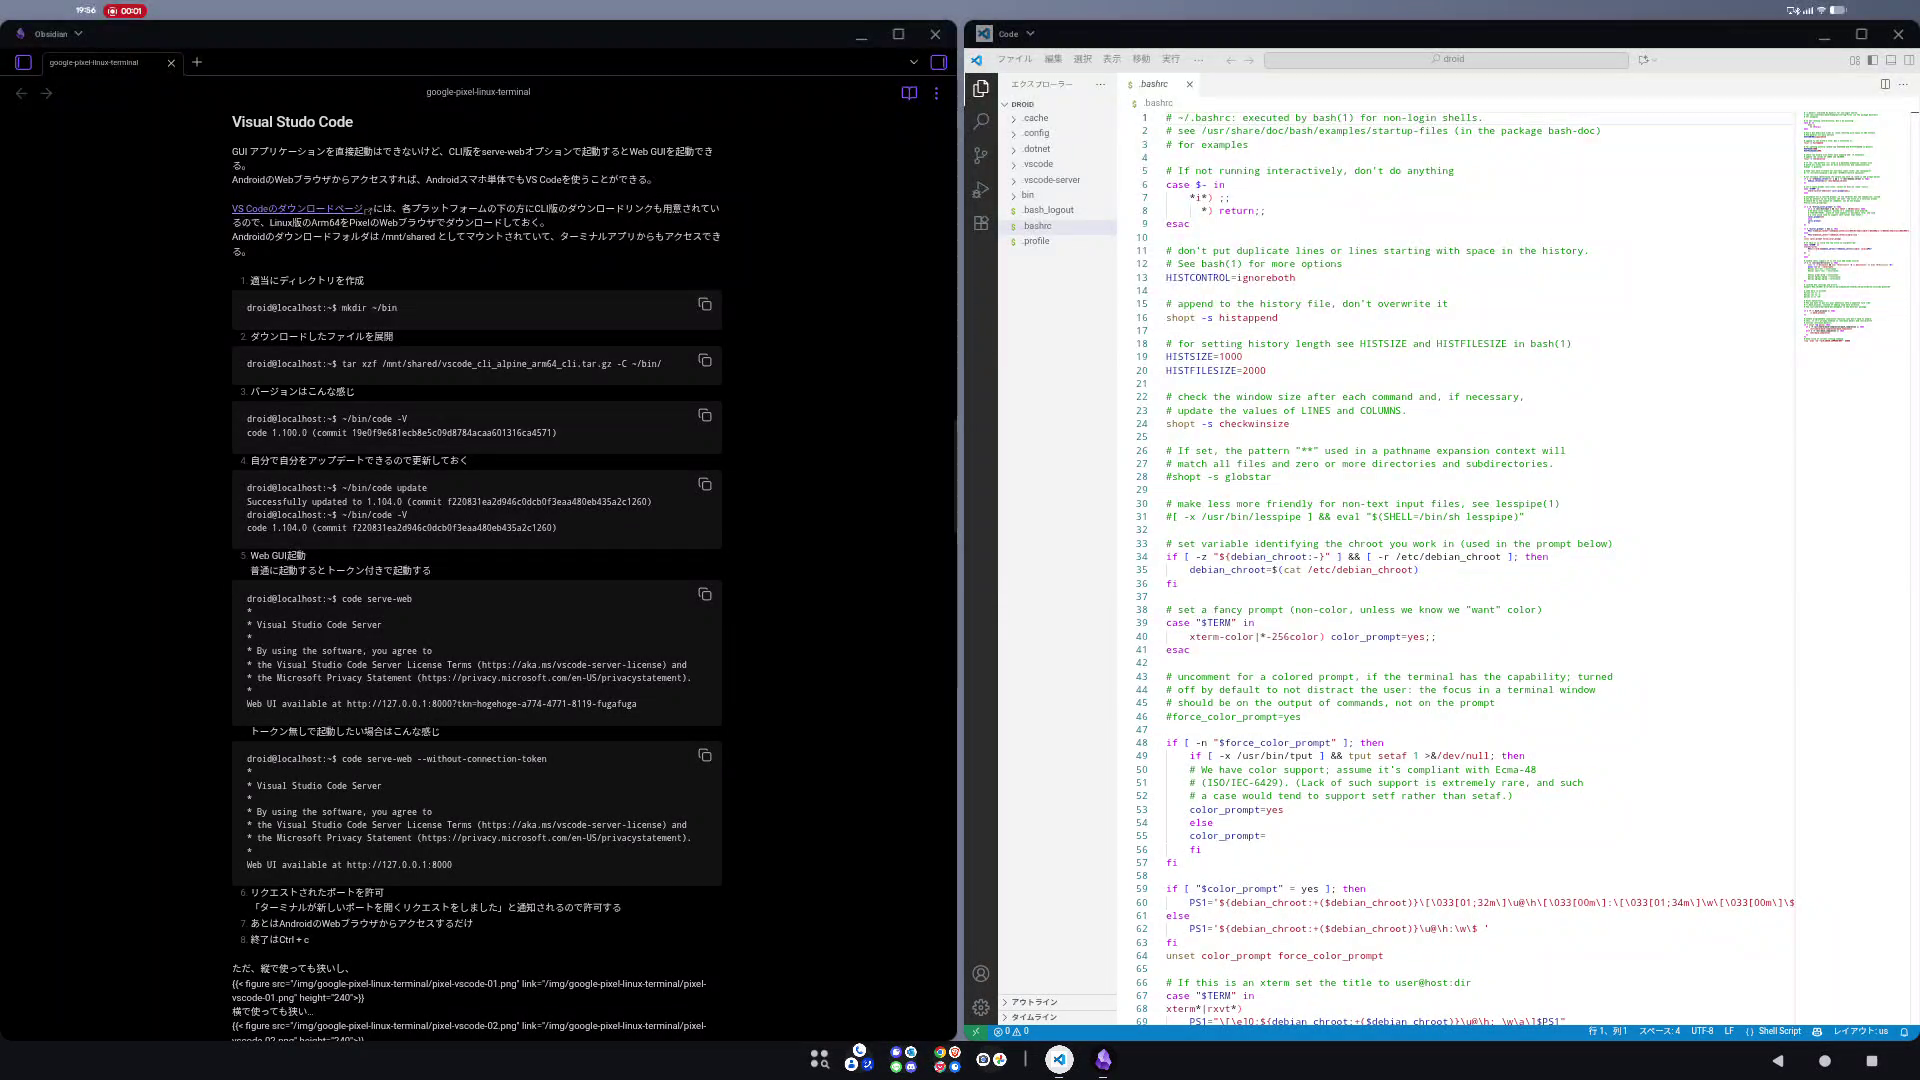
Pixel 10 Pro FoldだったらPixel単体でも快適に使えるかもしれない。
mise-en-place
インストール
公式サイトの「Install mise CLI」の「Debian/Ubuntu (apt)」の「arm64」に書いてあるコマンドを実行するだけ。
droid@localhost:~$ sudo apt update -y && sudo apt install -y gpg sudo wget curl
droid@localhost:~$ sudo install -dm 755 /etc/apt/keyrings
droid@localhost:~$ wget -qO - https://mise.jdx.dev/gpg-key.pub | gpg --dearmor | sudo tee /etc/apt/keyrings/mise-archive-keyring.gpg 1> /dev/null
droid@localhost:~$ echo "deb [signed-by=/etc/apt/keyrings/mise-archive-keyring.gpg arch=arm64] https://mise.jdx.dev/deb stable main" | sudo tee /etc/apt/sources.list.d/mise.list
droid@localhost:~$ sudo apt update
droid@localhost:~$ sudo apt install -y mise
インストール確認
droid@localhost:~$ mise version
              _                                        __
   ____ ___  (_)_______        ___  ____        ____  / /___ _________
  / __ `__ \/ / ___/ _ \______/ _ \/ __ \______/ __ \/ / __ `/ ___/ _ \
 / / / / / / (__  )  __/_____/  __/ / / /_____/ /_/ / / /_/ / /__/  __/
/_/ /_/ /_/_/____/\___/      \___/_/ /_/     / .___/_/\__,_/\___/\___/
                                            /_/                 by @jdx
2025.9.14 linux-arm64 (2025-09-20)
更新
インストールスクリプトでインストールした場合はself-updateで更新するけど、aptでインストールしたならaptで更新する。
droid@localhost:~$ mise self-update --verbose
DEBUG ARGS: mise self-update --verbose
Error:
   0: mise is installed via a package manager, cannot update

Location:
   src/cli/self_update.rs:40

Version:
   2025.9.14 linux-arm64 (2025-09-20)

Backtrace omitted. Run with RUST_BACKTRACE=1 environment variable to display it.
Run with RUST_BACKTRACE=full to include source snippets.
インストール直後は最新なので、もちろん新バージョンは無く更新はされない。
droid@localhost:~$ sudo apt upgrade mise
Reading package lists... Done
Building dependency tree... Done
Reading state information... Done
mise is already the newest version (2025.9.14).
Calculating upgrade... Done
0 upgraded, 0 newly installed, 0 to remove and 0 not upgraded.
miseでインストールした各種ツールへのパスを通す
「Activate mise」の「Other package managers」の「bash」に書いてあるコマンドを実行する。
takeshi@localhost:~$ echo 'eval "$(mise activate bash)"' >> ~/.bashrc
シェル読み直す↓またはターミナルのタブを新しく開いて反映させる。
droid@localhost:~$ exec $SHELL -l
Gemini CLI | Qwen Code
準備、Node.js インストール
miseでNode.jsをインストール
droid@localhost:~$ mise use node@lts
gpg: Signature made Thu Aug 28 21:12:28 2025 UTC
gpg:                using EDDSA key 5BE8A3F6C8A5C01D106C0AD820B1A390B168D356
gpg: Good signature from "Antoine du Hamel <antoine.duhamel@rosa.be>" [unknown]
gpg:                 aka "Antoine du Hamel <duhamelantoine1995@gmail.com>" [unknown]
mise ~/.config/mise/config.toml tools: node@22.19.0
インストール確認
droid@localhost:~$ mise list
Tool  Version  Source                      Requested
node  22.19.0  ~/.config/mise/config.toml  lts
Gemini CLI インストール
- Gemini CLI : オープンソース AI エージェント | Google Cloud 公式ブログ
- GitHub - google-gemini/gemini-cli: An open-source AI agent that brings the power of Gemini directly into your terminal.
前の手順で各種ツールへのパスを通してあれば、npmもそのまま使える。
droid@localhost:~$ npm install -g @google/gemini-cli

added 468 packages in 1m

145 packages are looking for funding
  run `npm fund` for details
Reshimming mise 22.19.0...
バージョン確認
droid@localhost:~$ gemini --version
0.5.5
Qwen Code
同じくQwen Codeもインストールできる。
droid@localhost:~$ npm install -g @qwen-code/qwen-code@latest

added 488 packages in 1m

152 packages are looking for funding
  run `npm fund` for details
Reshimming mise 22.19.0...
バージョン確認
droid@localhost:~$ qwen --version
0.0.12
Docker | Podman
Docker
公式のインストール手順に従うだけ
- GPG鍵追加
droid@localhost:~$ sudo apt-get update droid@localhost:~$ sudo apt-get install ca-certificates curl droid@localhost:~$ sudo install -m 0755 -d /etc/apt/keyrings droid@localhost:~$ sudo curl -fsSL https://download.docker.com/linux/debian/gpg -o /etc/apt/ keyrings/docker.asc droid@localhost:~$ sudo chmod a+r /etc/apt/keyrings/docker.asc - APTリポジトリ追加
droid@localhost:~$ echo \ "deb [arch=$(dpkg --print-architecture) signed-by=/etc/apt/keyrings/docker.asc] https://download. docker.com/linux/debian \ $(. /etc/os-release && echo "$VERSION_CODENAME") stable" | \ sudo tee /etc/apt/sources.list.d/docker.list > /dev/null droid@localhost:~$ sudo apt-get update - インストール
droid@localhost:~$ sudo apt-get install docker-ce docker-ce-cli containerd.io docker-buildx-plugin docker-compose-plugin - dockerグループに追加
droid@localhost:~$ sudo usermod -aG docker droid - ターミナルのタブを開き直す
シェル読み直しではグループ変更は反映されないので開き直す - dockerグループに入ったことを確認
droid@localhost:~$ groups users sudo video render docker - 試しに実行
droid@localhost:~$ docker run hello-world
Unable to find image 'hello-world:latest' locally
latest: Pulling from library/hello-world
198f93fd5094: Pull complete
Digest: sha256:54e66cc1dd1fcb1c3c58bd8017914dbed8701e2d8c74d9262e26bd9cc1642d31
Status: Downloaded newer image for hello-world:latest

Hello from Docker!
This message shows that your installation appears to be working correctly.

To generate this message, Docker took the following steps:
 1. The Docker client contacted the Docker daemon.
 2. The Docker daemon pulled the "hello-world" image from the Docker Hub.
    (arm64v8)
 3. The Docker daemon created a new container from that image which runs the
    executable that produces the output you are currently reading.
 4. The Docker daemon streamed that output to the Docker client, which sent it
    to your terminal.

To try something more ambitious, you can run an Ubuntu container with:
 $ docker run -it ubuntu bash

Share images, automate workflows, and more with a free Docker ID:
 https://hub.docker.com/

For more examples and ideas, visit:
 https://docs.docker.com/get-started/
Podman
- インストール
普通にaptでインストールするだけsudo apt install podman - 試しに実行
droid@localhost:~$ podman run hello-world
Resolved "hello-world" as an alias (/etc/containers/registries.conf.d/shortnames.conf)
Trying to pull docker.io/library/hello-world:latest...
Getting image source signatures
Copying blob 198f93fd5094 done
Copying config ca9905c726 done
Writing manifest to image destination
Storing signatures

Hello from Docker!
This message shows that your installation appears to be working correctly.

To generate this message, Docker took the following steps:
 1. The Docker client contacted the Docker daemon.
 2. The Docker daemon pulled the "hello-world" image from the Docker Hub.
    (arm64v8)
 3. The Docker daemon created a new container from that image which runs the
    executable that produces the output you are currently reading.
 4. The Docker daemon streamed that output to the Docker client, which sent it
    to your terminal.

To try something more ambitious, you can run an Ubuntu container with:
 $ docker run -it ubuntu bash

Share images, automate workflows, and more with a free Docker ID:
 https://hub.docker.com/

For more examples and ideas, visit:
 https://docs.docker.com/get-started/
