
概要
OpenSSHのSSHクライアントを使ってBasition経由で多段SSHするとき、ProxyCommandの代わりにProxyJumpを使うと直感的で分かり易くなって素晴らしい!というお話し。
OpenSSH 7.3/7.3p1 (2016-08-01) から使えるのに、多段SSHでググると未だにProxyCommandが上位に上がるので布教活動。
CentOSなら7.4.1708以降で使える。
CentOS 7.3.1611はOpenSSH 6.6.1p1だけど、CentOS 7.4.1708からOpenSSH 7.4p1。
ssh_configに書かない場合
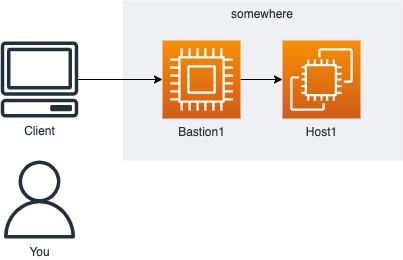
例えばこんな感じ↓の、Bastion1の向こうにいるHost1へSSHしたいとする。
ProxyCommand
$ ssh -o ProxyCommand='ssh -W %h:%p Bastion1' Host1
ProxyJump
ProxyCommandと同じように-oでProxyJumpを書いても少しスッキリするけど…
$ ssh -o ProxyJump=Bastion1 Host1
Jumpの-Jオプションを使えばBastion指定するだけ、分かり易さ段違い!
$ ssh -J Bastion1 Host1
-Jオプションはこんな感じ↓にBastionが増えるとより分かり易さが際立ってくる。

Bastion 2段以上の場合、ProxyCommandはssh_config書かないと無理だと思うけど、ProxyJumpならBastionを『,』で区切るだけ!
$ ssh -J Bastion1,Bastion2 Host1
例えば
$ ssh -J centos@192.168.1.20,ec2-user@bastion2.example.com centos@192.168.100.40
ssh_configに書く場合
ssh_configにジャンプの順番を書いてしまえばどちらもssh host1で接続できるけど、ProxyJumpの方が直感的で分かり易い。
ProxyCommand
Host bastion1
  User         centos
  HostName     192.168.1.20
  ProxyCommand none
Host bastion2
  User         ec2-user
  HostName     bastion2.example.com
  ProxyCommand ssh -W %h:%p bastion1
Host host1
  User         centos
  HostName     192.168.100.40
  ProxyCommand ssh -W %h:%p bastion2
ProxyJump
Host bastion1
  User         centos
  HostName     192.168.1.20
  ProxyJump    none
Host bastion2
  User         ec2-user
  HostName     bastion2.example.com
  ProxyJump    bastion1
Host host1
  User         centos
  HostName     192.168.100.40
  ProxyJump    bastion2